Highly versatile component for mobile development. It offers full customization to perfectly fit your needs, allowing you to adjust the size-to-knob ratio, joystick sprites, and custom color controls effortlessly!
Highly versatile component for mobile development. It offers full customization to perfectly fit your needs, allowing you to adjust the size-to-knob ratio, joystick sprites, and custom color controls effortlessly!
Incorporating a NTS Mobile Joystick into your game has never been simpler. Just drag the Joystick prefab onto your Canvas, configure the properties in the inspector, and seamlessly link the joystick to your player.
You can fully customize any NTS Mobile Joystick to seamlessly integrate with any game type or genre. Select or import your sprites, adjust the size and knob ratio, and choose your desired colors for a perfect fit!
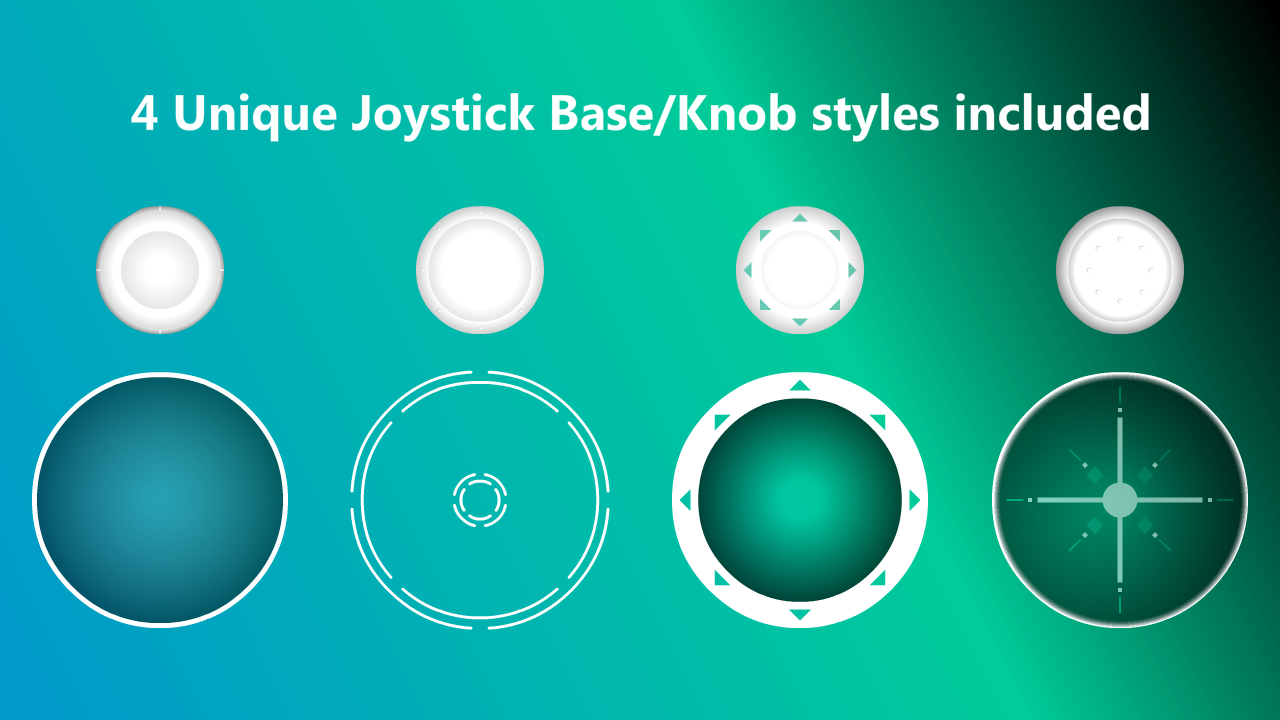
Four unique joystick bases and knobs are available for free use and can be configured to your exact preferences.
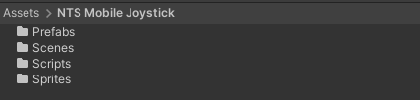
Start by importing NTS Mobile Joystick into your project.
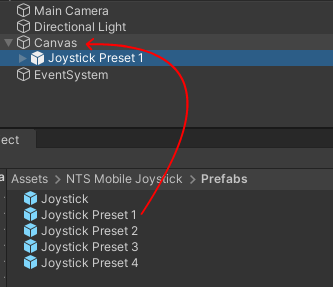
NTS Mobile Joystick requires a Canvas UI Object in your scene. Open the Prefabs folder and drag an instance onto your Canvas Object.
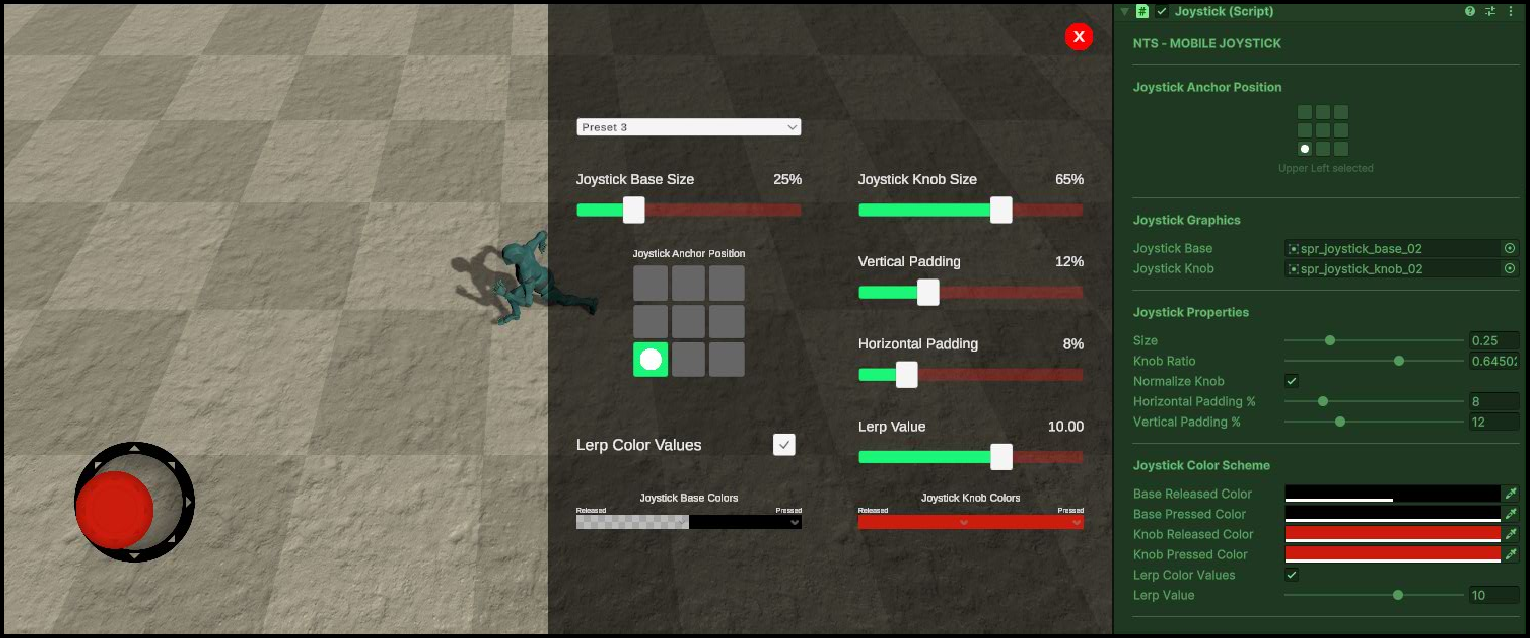
It's time to customize your joystick to fit the needs of your game! This is the fun part. Let's break down what exactly goes into NTS Mobile Joystick.
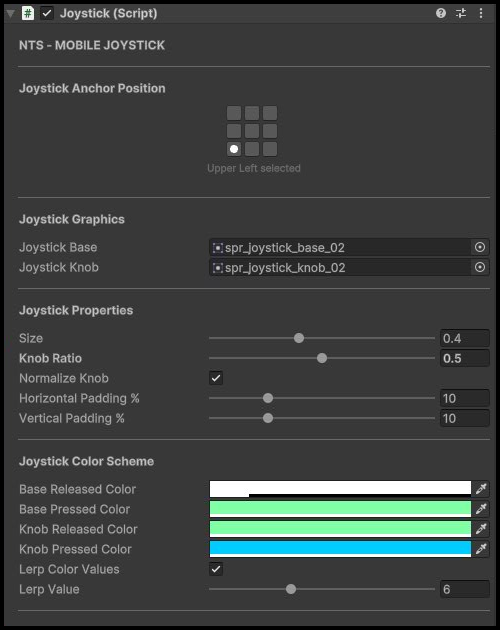
NTS MOBILE JOYSTICK
Select an anchored position from the nine available positions.
Joystick Graphics
Joystick Properties
Joystick Color Scheme
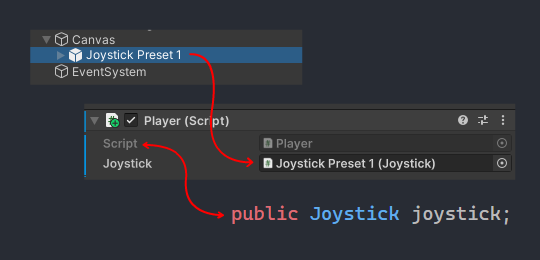
Linking the Joystick
Make sure your script has the Using Directive: NTS.MobileJoystick

Declare a field of type Joystick called joystick (or whatever you'd like) within your game objects script, and drag the joystick onto the inspector.
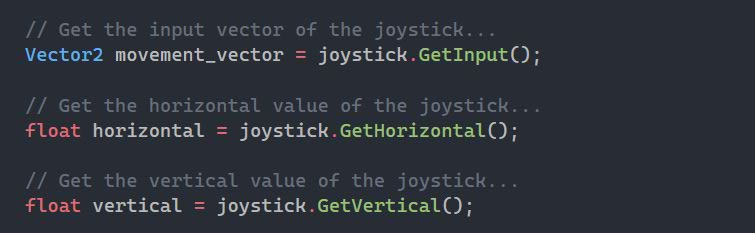
We have three options to get the input value from the Joystick:
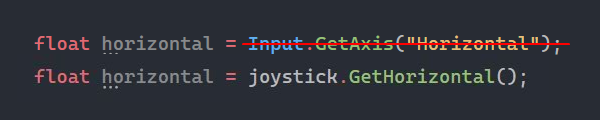
Now you can simply replace things like Input.GetAxis("Horizontal") with the joysticks methods via GetHorizontal()!
This demo highlights the key features of the NTS Mobile Joystick asset. As a Feature Demo, it's designed to give you a clear look at what the joystick can do, showcasing its core potential for your projects.
The Use Case Demo gives you a firsthand look at how the NTS Mobile Joystick asset could perform in a real-world gaming scenario, allowing you to experience its functionality in action.